Are you tired of your storm or screen door slamming shut or failing to close properly? A faulty door closer can be frustrating, but the good news is that most of these issues can be fixed with a few simple adjustments.
A pneumatic door closer is a device that uses air pressure to control the speed and force of your door's closing action, preventing slams and ensuring a secure shut. Properly installing and adjusting this device is crucial for smooth door operation, especially for storm and screen doors, which face frequent use. In this post, you'll learn everything you need to know about installing and adjusting a pneumatic door closer, from the tools you'll need to step-by-step instructions and common troubleshooting tips.
Understanding Pneumatic Door Closers
What is a Pneumatic Door Closer?
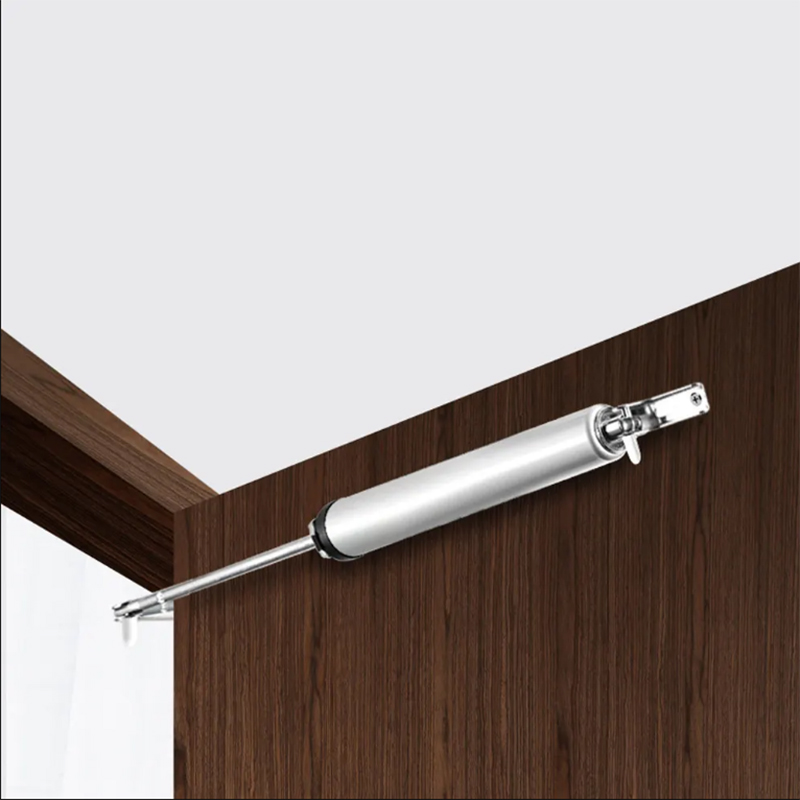
A pneumatic door closer is a device designed to control how your door closes. It uses air pressure to regulate the speed and force of the closing action, ensuring your door doesn't slam shut or swing open too quickly. When you open the door, air inside the closer is compressed. As the door closes, the air pushes a piston back out, slowing the door's movement. This helps create a smoother, quieter door operation.


Benefits of Using a Pneumatic Door Closer
Prevents Slamming
One of the main benefits of a pneumatic door closer is its ability to prevent your door from slamming shut. The air pressure inside the device regulates how quickly or slowly the door closes, ensuring a gentle, controlled shut every time.
Adjustable Speed and Tension
Pneumatic closers offer adjustable settings to suit your needs. You can fine-tune the tension to control the speed of your door's closing action, giving you flexibility depending on the weather or door usage. For example, you might want a slower closing speed in cold weather or when moving heavy items through the door.
Enhances Longevity
A properly adjusted pneumatic door closer not only helps your door function smoothly but also extends its lifespan. By preventing harsh slamming and controlling the door's movement, it reduces wear and tear on both the door and its hardware.
This makes pneumatic closers especially useful for storm and screen doors, which endure frequent opening and closing. Whether you're dealing with a high-traffic entryway or a quiet back door, a pneumatic door closer can provide the right balance between efficiency and durability.
Supplier tip: For property portfolios or repeated builds, standardizing on one manufacturer's hardware family can streamline maintenance. A door hardware supplier like D&D Hardware provides coordinated door components—closers, hinges, latches, and brackets—so replacements and accessories are easy to match across sites.
Tools and Materials You'll Need for Installation
Essential Tools for Installing a Pneumatic Door Closer
Before you begin installing your pneumatic door closer, make sure you have the right tools on hand. Here are the essentials:
Screwdriver (flathead or Phillips-head)
A good screwdriver is key for securing the jamb bracket and door bracket. You may need a flathead or Phillips-head screwdriver depending on the screws used.
Pliers (optional)
Pliers can come in handy if you need to adjust or remove any pins or small parts during the installation process. They're especially useful if you're dealing with tight spots or need a firmer grip.
Lubricating Oil (optional)
Applying a bit of lubricating oil to the closer's moving parts can help ensure smooth operation, especially if you're installing a door closer that's been sitting unused for a while.
Measuring Tape
Proper placement is important, so a measuring tape will help you position the brackets correctly and ensure your door closer is mounted in the right spot.

Materials and Parts Included in the Kit
When you purchase a pneumatic door closer, you'll typically find everything you need to get started. These parts include:
Closer Unit
The main device that controls the door's closing action. It's usually a cylinder with air pressure that adjusts the speed of the door's movement.
Jamb Bracket and Door Bracket
These brackets are what hold the closer in place. The jamb bracket attaches to the door frame, and the door bracket connects to the door itself. They work together to ensure the closer functions smoothly.
Screws, Pins, and Washers
These small but essential parts secure the brackets and closer in place. Depending on your kit, you may find different types of screws or pins, so always check to make sure you have the right ones for your door.
Keep in mind that some kits may include additional parts or accessories, so be sure to check what's included in the box before you start the installation.
Step-by-Step Guide on How to Install a Pneumatic Door Closer

Preparing the Door for Installation
Before you begin, it's important to make sure your door is ready for installation. Here's what you need to do:
Ensure the door is clean and free of debris
A clean door makes for a smoother installation process. Wipe down the door and frame to remove any dirt or dust that could interfere with the closer's installation.
Position the door properly
Double-check the door hinges and the frame type. Make sure the door swings properly and is aligned. If the door is misaligned or doesn't swing easily, it could affect how the closer operates once it's installed.
Mounting the Jamb Bracket
The jamb bracket is the part that will attach to the door frame. Here's how to do it:
Choose the correct side for installation
Always mount the jamb bracket on the interior side of the door, where the closer will be installed. Positioning it on the wrong side could cause the door to operate incorrectly.
Screw the jamb bracket into the door frame
Align the jamb bracket flush against the door. Use your screwdriver to securely screw it into place. Make sure it's tightly fixed, as this will be the anchor for the entire closer system.
Attaching the Pneumatic Closer
Now it's time to connect the pneumatic closer:
Connect the jamb-side nose of the closer to the jamb bracket
Slide the closer's jamb-side nose into the installed jamb bracket. It should fit snugly, so the closer stays in place.
Insert the pin to hold the closer in place
Once the closer is positioned correctly, insert the pin to secure it. This pin ensures the closer stays attached and operates as intended.
Installing the Door Bracket
Next, you'll need to attach the door bracket:
Mark the spot on the door where the bracket rests
Close the door and gently press the closer against it to see where the bracket should go. Mark this spot with a pencil or marker.
Attach the bracket to the door
Once you've marked the spot, remove the closer, and attach the bracket to the door using screws. Be sure it's securely in place.
Rehook the closer to the door bracket
After the door bracket is attached, hook the pneumatic closer onto the bracket. Make sure it's properly connected and ready to function.
Finalizing the Installation
Now, let's finish up:
Adjust the hold-open washer
Move the hold-open washer to the correct position on the closer. This will help control the door's opening and closing mechanism, ensuring it stays open when needed.
Test the door operation
Open and close the door multiple times to test the closer's functionality. Ensure the door closes smoothly and doesn't slam shut or fail to close completely.
Ensure no obstruction or issues
While testing, make sure there's no obstruction blocking the door's movement. If the door sticks or doesn't close correctly, you may need to make minor adjustments.
Once everything is in place and working properly, you're all set!
How to Adjust a Pneumatic Door Closer

Why You May Need to Adjust Your Pneumatic Door Closer
A pneumatic door closer helps ensure smooth door operation, but sometimes it needs a little tweaking. You may notice a few common problems that indicate an adjustment is necessary:
Door Slamming: If your door slams shut, the closer might be closing too quickly. This can be annoying and could even damage the door over time.
Slow Closing: On the flip side, if the door closes too slowly, it might not be as efficient as you need it to be.
Door Not Closing Completely: Sometimes, the door doesn't fully close, leaving a small gap that can let drafts or insects inside.
Adjusting the tension is crucial for optimal door operation. It helps control the speed and force of the closing action, ensuring the door closes smoothly without slamming or leaving gaps.
Step-by-Step Guide to Adjusting the Closing Speed
Adjusting the closing speed is simple, and it starts by finding the adjustment screw:
Find the adjustment screw on the closer barrel
The adjustment screw is usually located at the end of the closer's barrel. It may be covered, so you might need to remove a small cap to access it.
Turn the screw clockwise to slow the closing speed (increase tension)
If the door is closing too quickly, turning the screw clockwise will increase the tension, making the door close more slowly and gently.
Turn the screw counterclockwise to increase the closing speed (reduce tension)
If the door closes too slowly, turning the screw counterclockwise will reduce the tension and speed up the closing action.
Fine-Tuning the Door's Latching Speed
Once you've adjusted the closing speed, it's time to fine-tune the door's latching speed. This is important if the door doesn't latch properly:
Adjust the latch mechanism if the door doesn't latch correctly
Sometimes, even if the door closes, it might not catch properly on the latch. If the door is just slightly open, you can adjust the tension on the latch mechanism to ensure it engages securely.
Adjust the latch tension to ensure proper engagement
Locate the latch mechanism, and you may find a screw to adjust the tension. Turning it slightly can help the door latch firmly, preventing it from staying ajar.
Testing and Re-adjusting
After making adjustments, it's important to test the door's operation to make sure everything is working as it should:
Open and close the door after each adjustment
Test the door by opening and closing it a few times after each adjustment. This helps you see if the speed and latching are just right.
Tips for fine-tuning the closer by making small adjustments
Always make small changes and test frequently. This way, you can avoid over-adjusting, which might make the door too slow or too fast.
Ensure smooth operation and eliminate unwanted noises
Pay attention to any strange noises, like squeaks or creaks. If the door is still noisy after adjustments, it could indicate a need for lubrication or further tweaking.
Troubleshooting Common Issues
Sometimes, adjustments don't fully resolve the issue. If you're still facing problems, here are a few things to check:
Door slamming too hard or not closing at all
If the door is slamming hard or not closing at all, the tension might need further adjustment. Try turning the screw again, in small increments, to fine-tune the speed.
The closer making strange noises or sticking halfway
If the closer is making unusual noises or stopping halfway, there could be something blocking its mechanism. It might also need lubrication to ensure smooth movement.
Why some adjustments might not work and the possibility of a faulty closer
If your adjustments aren't solving the problem, the closer might be faulty or worn out. Over time, parts may wear down, requiring replacement.
With these steps, you can adjust your pneumatic door closer to ensure it works efficiently and smoothly.

When to Replace a Pneumatic Door Closer
Signs Your Pneumatic Door Closer Needs Replacement
A pneumatic door closer is designed to last for several years, but it won't last forever. Here are some signs it's time for a replacement:
Visible damage or wear to the closer unit
If you notice cracks, dents, or rust on the closer unit, it may no longer function properly. Physical damage can affect how the door closes or causes it to fail entirely.
Inability to adjust the closer for proper function
If you've tried adjusting the closer and the door still slams shut, closes too slowly, or doesn't close at all, it might be time for a new one. A worn-out closer may lose its ability to hold adjustments.
Over 7 years of use or loss of effectiveness
On average, pneumatic door closers last around 7 years. If your closer has passed this mark and you notice a decline in performance, it might be time for a replacement.
How to Choose a Replacement Pneumatic Door Closer
When it's time to replace your door closer, choosing the right one is crucial. Here's how to make sure you pick the best option for your door:
Ensuring compatibility with your door
Check the size, type, and frame material of your door to make sure the new closer fits. Some closers are designed specifically for wood, steel, or aluminum doors, so choosing the right one will ensure proper function.
Tips for buying a quality replacement
Look for a closer that offers durability and ease of adjustment. It should be easy to install, and the adjustment screws should be simple to access. Read reviews to find a closer that's well-reviewed for longevity and performance.
Specification checklist for purchasers:
Confirm available finishes and corrosion-resistance for coastal or humid sites.
Ask for third-party test data (cycle testing) and installation templates.
Verify availability of spare pins/brackets and lead times for bulk orders.
Request warranty terms and after-sales support contacts.
If you're evaluating options, D&D Hardware can provide technical sheets, samples for sale, and guidance on selecting coordinated door hardware packages. This is helpful when you need a single manufacturer or supplier to cover multiple components across a project.
The Cost of Replacing a Pneumatic Door Closer
Replacing a pneumatic door closer doesn't have to break the bank. Here's what you can expect in terms of cost:
Average prices for pneumatic door closers
New closers typically range from $25 to $50, depending on brand and quality. You can find lower-cost options at home improvement stores or online, but make sure it's a reliable brand.
Cost-saving tips for DIY installation
Installing the new closer yourself can save you money on labor costs. If you're comfortable with basic tools and following instructions, you can easily replace it yourself. Most pneumatic door closers are designed for easy DIY installation, which makes this a cost-effective option.
Conclusion
In this guide, we've walked through the steps for installing and adjusting a pneumatic door closer. From preparing the door and mounting the brackets to adjusting the closing speed and fine-tuning the latch, you now have the knowledge to handle this task with ease.
Properly maintaining and adjusting your door closer ensures long-term performance. It prevents door slamming, enhances efficiency, and helps extend the life of your door and its components.
Don't hesitate to take on this DIY project. Installing and adjusting a pneumatic door closer is a simple yet rewarding task that can make your doors work smoothly for years to come.
Explore Pneumatic Door Closers from D&D Hardware
If you need help selecting the right pneumatic door closer model (DDPC001/002/003), we can provide comparative specifications, test data, and on‑site application guidance. D&D Hardware supports wholesale and project-based supply, helping you achieve the optimal balance between timeline and cost. Get the spec sheets and sample evaluation now.
Frequently Asked Questions (FAQs)
Q: Can I Install a Pneumatic Door Closer Myself?
A: Yes, installing a pneumatic door closer is a straightforward DIY project. With basic tools like a screwdriver and measuring tape, you can easily follow the step-by-step instructions to install and adjust the closer.
Q: What Type of Door Closer Should I Use for My Storm Door?
A: For storm doors, a pneumatic door closer is ideal. Ensure you choose one compatible with the door's material (wood, steel, etc.) and size for optimal performance.
Q: How Long Does a Pneumatic Door Closer Last?
A: A well-maintained pneumatic door closer typically lasts around 7 to 10 years, depending on usage and conditions.
Q: Can I Adjust the Closing Speed of My Door Closer for Both Summer and Winter?
A: Yes, you can adjust the closing speed for seasonal changes. In colder weather, you might want a slower closing speed, while warmer weather may require a faster setting.
Contact us now:
Contact: David Jian
Mob: 0086-139 2903 7292
Email: David@dndhardware.com, sales@dndhardware.com
Jobby Zhang
Mob: 0086-137 2599 9617
Email: jobby@dndhardware.com


 English