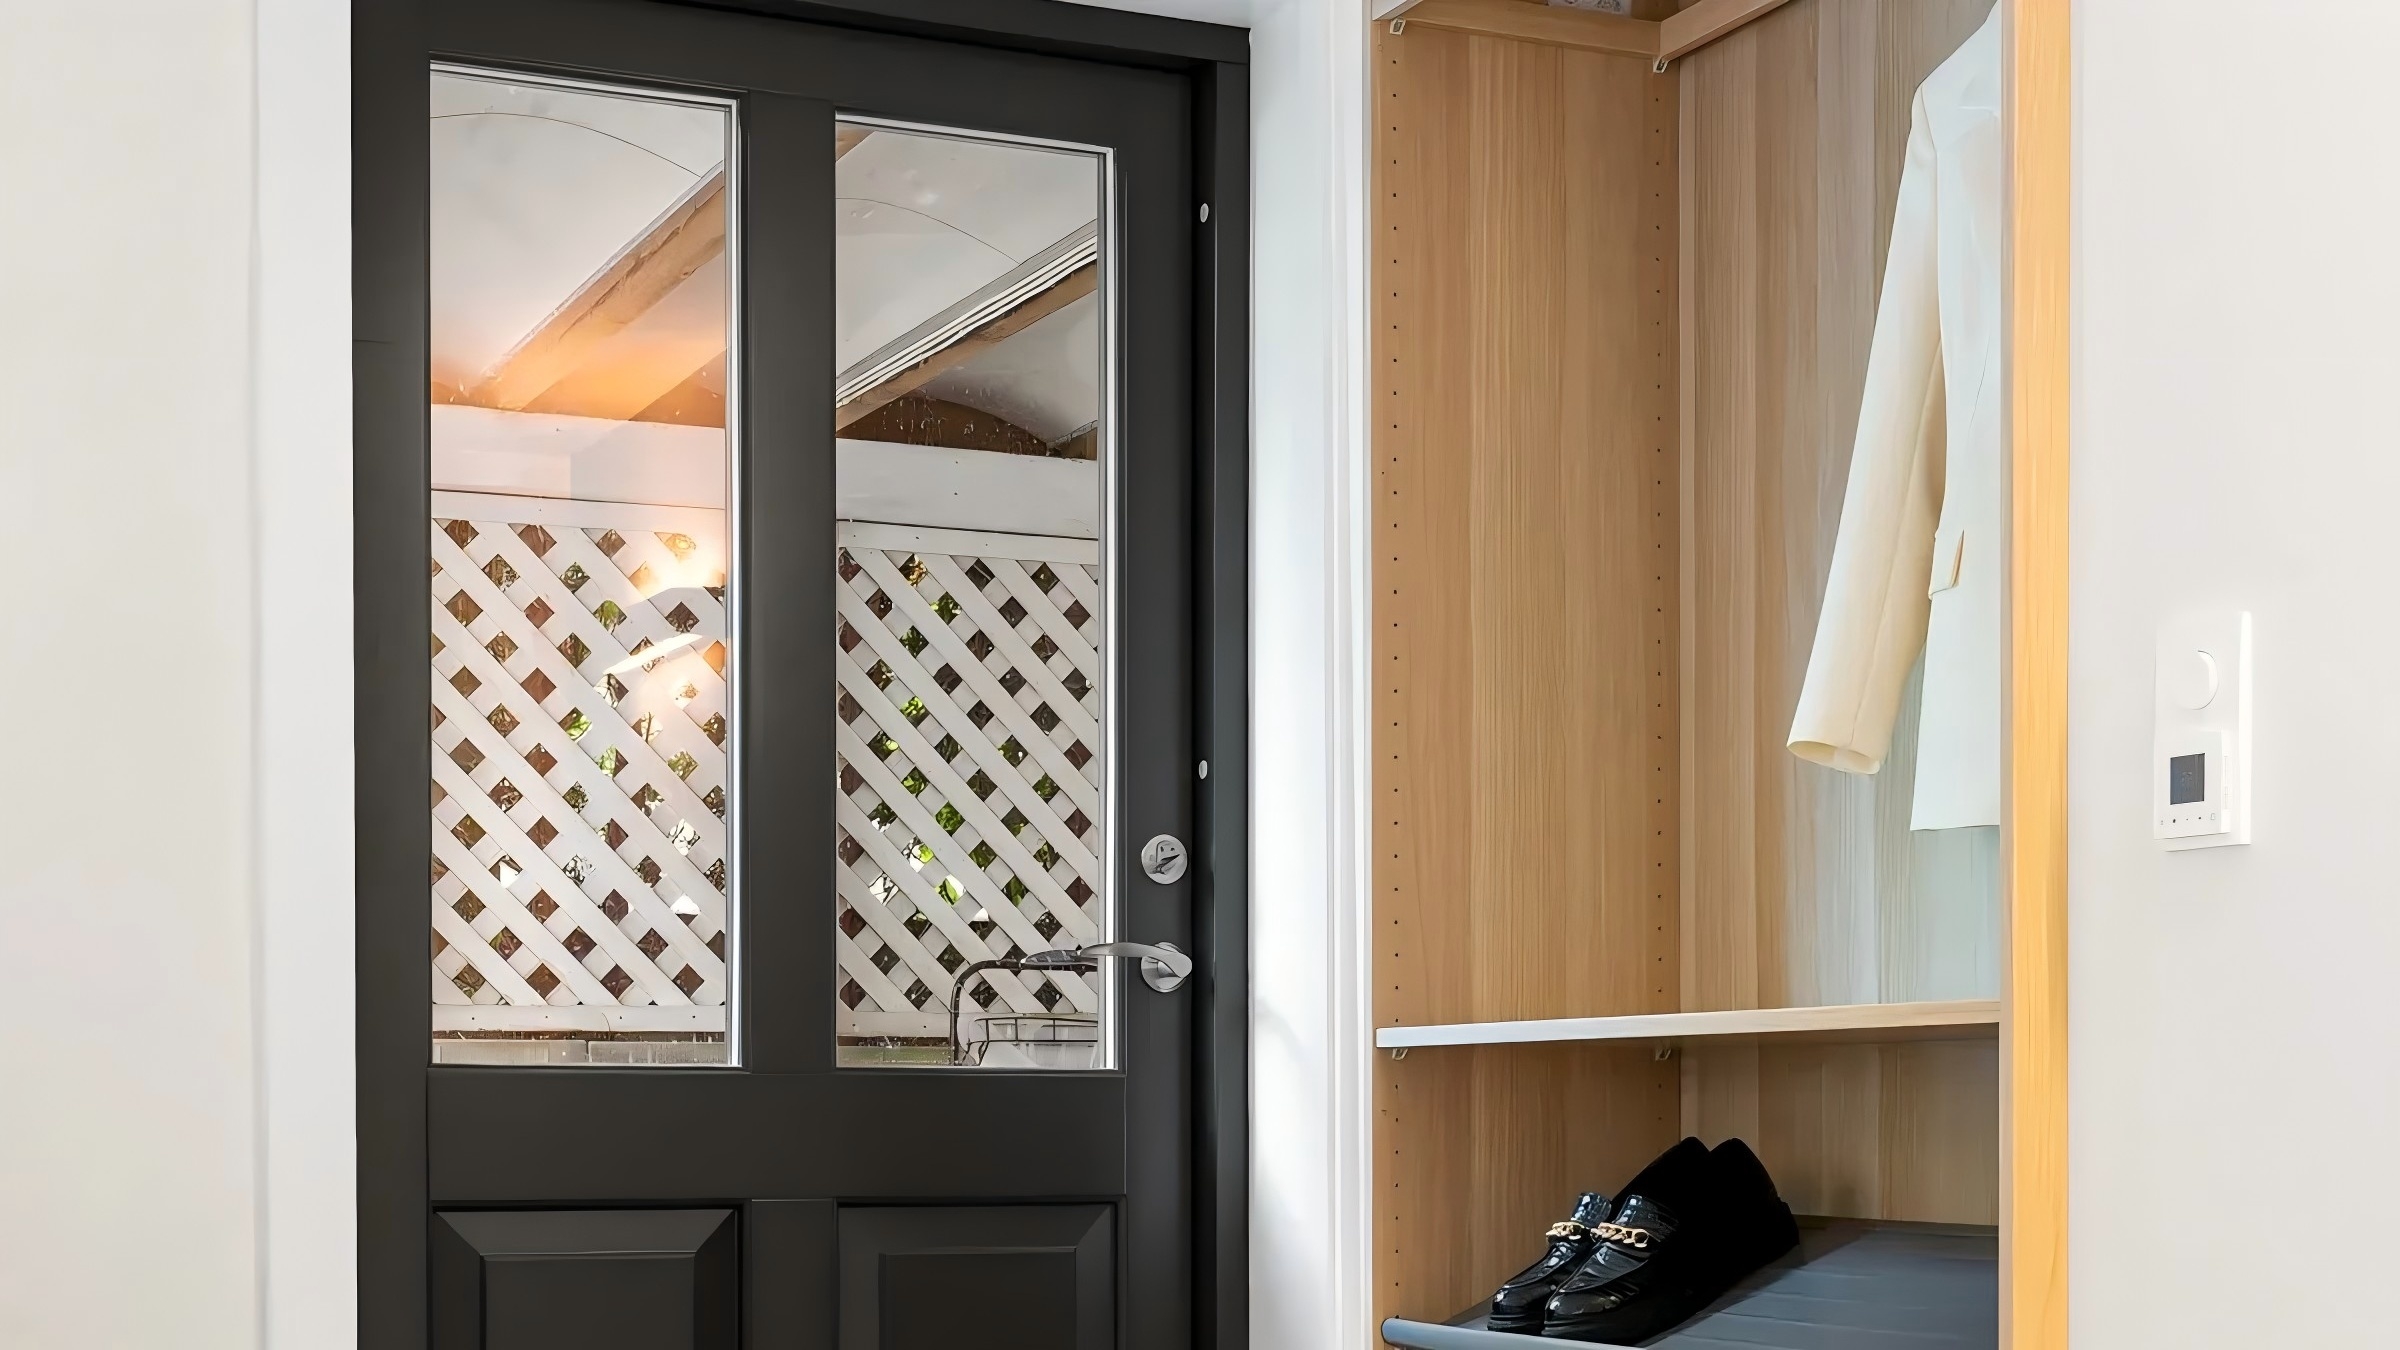
You can install invisible door hinges and achieve a seamless look in your kitchen or any modern space. Many DIYers complete installation in just one or two weekends, even for hidden door projects where the recommended hinge supports up to 110 pounds. Hidden door hinges and invisible door hinges transform hidden door entries, creating a clean, invisible finish. These hinges offer not only a modern style but also long-term efficiency. Manufacturers and suppliers in China, like D&D HARDWARE, deliver invisible door hinges that help you upgrade hidden doorways. When you install hidden hinges, you get an invisible, seamless result that stands out in any building.

Key Takeaways
Gather all essential tools and certified hidden door hinges before starting your project to ensure a smooth installation.
Choose the right type and size of hidden hinges based on your door's weight and thickness for a secure and seamless fit.
Measure and mark hinge placement carefully, using a level and marking tools to avoid mistakes and ensure perfect alignment.
Use a mortising jig and chisel to create precise recesses for the hinges, making sure they sit flush with the door and frame.
Install hinges by pre-drilling pilot holes and screwing them in without overtightening to prevent wood damage.
Adjust hinges after installation using 3D adjustability features to achieve a flush, even door fit and smooth operation.
Test the door's movement and listen for any squeaks or sticking; make small adjustments as needed for quiet, smooth use.
Maintain your hidden hinges by lubricating twice a year, cleaning dust, and tightening screws to extend their lifespan and performance.
Tools and Materials
Before you start your hinge installation project, you need the right tools and materials. Having everything ready makes the process smoother and helps you get a professional finish. Let's break down what you need for installing hidden door hinges.
Essential Tools
You want to make sure your toolkit covers all the basics for a clean installation. Here's a handy checklist:
Power drill (cordless or corded)
Mortising jig (for precise recesses)
Combination square (for accurate marking)
Self-centering bit (for hinge screw holes)
Chisel set (for fine-tuning mortises)
Screwdriver set (manual or electric)
Measuring tape
Pencil or marking knife
Level
Tip: Using a mortising jig helps you get perfect, repeatable cuts for concealed hinges. It saves time and reduces mistakes.
Materials List
You need quality materials for a secure and long-lasting result. Here's your hinge installation supply list:
Concealed door hinges (choose the right size and type for your door)
Screws (usually included in a hidden door kit)
Wood filler (for touch-ups)
Sandpaper (for smoothing edges)
Door and frame (wood or metal, depending on your project)
Optional: Soft-close dampers for a premium feel
When you pick your concealed door hinges, look for products tested to international standards. Manufacturers and suppliers in China, like D&D HARDWARE, offer hinges that meet strict certifications. These include ANSI A156.18 for materials and finishes, and UL certification for fire-rated hinges. You can trust hinges made from high-strength plated steel, zinc alloy castings, or 300 series stainless steel for durability.
Here's a quick look at some key standards for hinges:
Standard Code | Hinge Type | What It Covers |
IS 12817:2020 | Stainless Steel Butt Hinges | Materials, finish, performance |
| IS 1341:2018 | Steel Butt Hinges | Materials, manufacture, finish |
Note: Always check for fire-rated hinge test certificates and installation instructions in your hinge installation supply list. This ensures your project meets safety and quality requirements.
Safety Gear
Safety comes first. You want to protect yourself during every step of hinge installation. Here's what you should have:
Safety glasses (to shield your eyes from dust and debris)
Work gloves (for grip and hand protection)
Ear protection (if you use power tools for long periods)
Dust mask (especially when sanding or cutting wood)
Wearing the right gear keeps you safe and focused. You can work confidently, knowing you have the right protection.
When you gather your tools and materials, you set yourself up for success. Using certified concealed door hinges and following a complete hinge installation supply list helps you achieve a seamless, professional look. If you choose a hidden door kit from a trusted manufacturer or supplier, you get everything you need in one package.

Choosing Hidden Door Hinges
When you want a seamless look in your hidden door project, picking the right hinge makes all the difference. Let's break down the main types, how to choose the right size, and why certified hinges matter.
Types of Hidden Hinges
You might hear people use "hidden door hinges" and "invisible door hinges" like they mean the same thing. They both hide the hardware when the door closes, but there are some differences. Hidden door hinges usually refer to any hinge that you can't see from the outside. Invisible door hinges, like SOSS or pivoting hinge styles, disappear completely into the door and frame. These work great for secret rooms, or anywhere you want a truly invisible finish.
Manufacturers and suppliers in China, such as D&D HARDWARE, offer a wide range of concealed door hinges. You can find hidden door hinges for pivoting hinge models for heavy doors. Some hinges, like European concealed door hinges, give you 3D adjustability. That means you can tweak the height, depth, and side-to-side position for a perfect fit.

Here's a quick comparison to help you decide:
Hinge Type | Durability (Years) | Weight Capacity / Features | Adjustability | Noise Reduction | Visibility |
Pivoting Hinge | 12+ | Supports heavy doors, smooth swing | N/A | No | Invisible |
European | 8-10 | 3D adjustability, easy alignment | High | No | Invisible |
Single-Axis Concealed | Valid CE marking EN 1935 | Standard concealed hinge performance | N/A | No | Invisible |
Tip: Concealed door hinges work best in the hidden door projects if you want to cut down on noise. Pivoting hinge options shine when you need to support a heavy hidden door or want a dramatic, smooth swing.
Selecting the Right Size
You want your invisible door hinges to match your door's weight and thickness. For a hidden door or a larger entry, you need a heavy-duty pivoting hinge or adjustable concealed hinges. Always check the weight rating. If you pick a hinge that's too small, your door might sag or not close right.
Measure your door's thickness and height.
Check the manufacturer's specs for weight limits.
Choose invisible door hinges that fit your project's needs.
If you're not sure, reach out to a supplier or manufacturer in China like D&D HARDWARE. They can help you pick the right hinge for your hidden door.
Fire-Rated and Certified Hinges
Safety matters, especially for doors in busy areas or fire-rated zones. Not all invisible door hinges meet strict safety standards. Single-axis concealed hinges are the only ones with valid CE markings under EN 1935. This means you get reliable, tested performance. Multi-axis hinges might show CE marks, but they use different guidelines and sometimes overstate their abilities.
Note: Always look for UL, CE, or EN certifications when you buy invisible hinges for a hidden door. Certified hinges give you peace of mind and meet building codes.
Some invisible door hinges also offer soft-close features, which add comfort and reduce wear. If you want a hidden door that closes quietly, hidden door hinges are a smart pick.
When you choose the right invisible door hinges, you get a smooth, secure, and invisible finish. Your hidden door will look modern and work perfectly for years.


Preparation and Marking
Before you start the step-by-step installation process, you need to plan your hidden hinge installation carefully. This stage sets the foundation for a seamless install. If you want your door to look modern and operate smoothly, take your time here. Many DIYers rush this part, but you can avoid mistakes by following a few proven steps.
Measure and Mark Placement
You want your hidden hinges to line up perfectly. Start by gathering your measuring tape, pencil, ruler, and marking gauge. These tools help you get accurate results every time.
Set your marking gauge just a bit less than the barrel thickness—about 1/32" less. This small gap helps your door close without rubbing.
Use a pencil to mark the hinge positions on both the door and the frame. Sharp lines make it easy to see where to cut the recess.
Place shims under the door to hold it steady in the opening. This keeps your hands free and your measurements accurate.
Mark the top hinge about 5-7 inches from the top edge of the door. Mark the bottom hinge 10-11 inches from the bottom. If you need a third hinge, center it between the top and bottom.
Trace the outline of each hinge lightly with your pencil. Then, score the outline using a utility knife or marking gauge. This gives you a crisp edge for the recess.
Tip: Always double-check your marks before you start cutting. A small mistake here can throw off the whole installation.
Align for Seamless Look
Alignment is key for a seamless finish. You want the door face to sit flush with the frame. After you mark the hinge outlines, use a level to check your lines. If they are off, adjust them now.
Drill a pilot hole for the top hinge and insert a screw. This holds the door in place while you check alignment.
Close the door to see if the faces are flush. If not, move the hinge slightly and try again.
Once the top hinge looks good, repeat the process for the bottom hinge. Secure it, check for flushness, and adjust as needed.
When both hinges are set, drill and insert the rest of the screws.
A manufacturer or supplier from China, like D&D HARDWARE, often includes detailed instructions in their kits. These guides help you get professional results, even if this is your first hidden hinge installation.
Tips for Accuracy
You can avoid common mistakes by following a few best practices:
Always pre-drill pilot holes. This prevents wood from splitting and keeps screws straight.
Use a level to check hinge alignment. Even a small tilt can cause the door to sag or bind.
Chisel the recess to match the hinge leaf thickness. A flush fit makes the install look clean and professional.
After you attach the door, check for smooth operation. If the door sticks or rubs, adjust the hinge placement by removing and repositioning screws.
Make sure the hinge barrel sticks out equally on both sides. This detail helps the door swing smoothly.
Note: Plan your hidden hinge installation before you cut or drill. Careful planning saves time and helps you achieve a seamless install.
When you follow these steps, you set yourself up for a successful installation. You get a door that looks great and works perfectly, thanks to careful measuring, marking, and alignment.
Step-by-Step Hinge Installation
Ready to get hands-on? This step-by-step hinge installation guide will help you install invisible door hinges like a pro. If you want a hidden door, you can follow these steps for a flawless finish.
Mortising for Hidden Hinges
You need to create a recess for the hinges before you install hidden hinges. This part takes patience, but it sets the stage for a smooth, invisible look.
Marking the Outline
Start by placing the hinge template on your door and frame. Use a sharp pencil or marking knife to trace the exact outline. Double-check your marks. Even a small mistake can throw off the whole installation. Many DIYers run into trouble here—over 60% of installation errors come from inaccurate measurements or marking. Take your time and make sure your lines are crisp and clear.
Cutting the Recess
Now, grab your mortising jig and chisel set. Secure the door or frame so it doesn't move. Use your drill to remove most of the material inside the outline. Then, use a sharp chisel to clean up the edges and corners. You want the recess to match the hinge thickness exactly. If you go too deep or too shallow, the invisible door hinges won't sit flush.
Here's a quick table to help you keep your cuts precise:
Aspect of Mortising | Recommended Tolerance / Precision |
Mortise Depth | Follow manufacturer's template or ANSI A156.115, ± 1/64 inch |
Cutout Depth at Frame or Door Faces | Can exceed mortise depth by 1/16 inch for adjustments |
Depth for Recessed or Concealed Hardware | Use template, +1/16 inch / -0 inch tolerance |
Notches in Door Faces | Same as recessed hardware depth |
Stick to these tolerances. They give you enough room for field adjustments, like shimming, but keep everything tight for a clean, invisible result.
Checking Depth
After you cut the recess, check the depth with a combination square or depth gauge. Place the hinge in the recess. It should sit flush with the surface. If it sticks out, chisel a bit more. If it sinks below the surface, use a shim to bring it up. Manufacturers and suppliers in China, such as D&D HARDWARE, often provide templates and guides to help you get this step right.
Tip: Always test-fit the hinge before you move on. A flush fit means your door will close smoothly and look seamless

Install Invisible Door Hinges
Once you finish the mortising, you can install invisible door hinges. Place the hinge into the recess. Make sure the hinge arms line up with your marks. Use a self-centering bit to drill pilot holes for the screws. This keeps the screws straight and prevents the wood from splitting.
Screw the hinge into place. Don't overtighten. You want the hinge to sit snug, but not crush the wood. Repeat this process for each hinge on the door and frame. If you're working on a kitchen project, invisible door hinges add a premium feel and keep things quiet.
Note: Over 55% of DIY door installation failures happen during mortising and hinge mounting. Take your time and check your work at every step.
Secure Hinges to Door and Frame
Now you're ready to install the hinges onto the door and frame. Hold the door in position. Use shims to keep it steady. Align the hinges with the recesses in the frame. Insert the screws and tighten them evenly.
If you're installing concealed hinges on a heavy hidden door, consider using a pivoting hinge for extra support. These hinges handle more weight and keep the door swinging smoothly. For kitchen cabinets, standard invisible door hinges work great and give you that seamless, modern look.
After you mount the door onto the frame, open and close it a few times. Check for smooth movement. If the door rubs or sticks, adjust the hinges by loosening the screws and shifting the hinge slightly. Tighten the screws again and test the door.
Tip: Always pre-drill pilot holes before you install the screws. This simple step prevents splitting and keeps your installation looking professional.


Manufacturers and suppliers in China, like D&D HARDWARE, design invisible door hinges for easy adjustment. Many models offer 3D adjustability, so you can tweak the height, depth, and side-to-side position after you install the hinges. This feature helps you get a perfect fit, even if your door or frame isn't perfectly straight.
When you install hidden hinges with care, you get a flawless, invisible finish. Your kitchen or hidden door will look modern and operate smoothly for years. Installing concealed hinges may seem tricky at first, but this step-by-step installation process makes it easy to achieve professional results.
Adjust and Test
Align Hidden Door Hinges
You have installed your hidden door hinges, but now comes the important part—getting everything lined up. Start by closing the door slowly. Look at the gap between the door and the frame. You want it to look even from top to bottom. If you see a bigger gap at one end, you need to make a small adjustment.
Most modern concealed hinges from a trusted manufacturer or supplier in China, like D&D HARDWARE, offer 3D adjustability. This means you can move the door up, down, left, or right. Use a screwdriver to turn the adjustment screws on the hinge. Turn them a little at a time. Watch how the door moves. Keep checking the gap as you go. This step helps you get a seamless look and a professional finish.
Tip: If you feel unsure, check the instructions from your hinge supplier. Many include diagrams or videos to help you with adjusting concealed hinges.
Test Door Operation
Now, you want to see how the door works. Open and close it a few times. Listen for any squeaks or rubbing. The door should move smoothly and not catch on the frame. If you notice any sticking, stop and check the hinge screws. Sometimes, a screw might be too tight or too loose.
Here's a quick checklist to help you test for smooth operation:
Open the door fully and close it gently.
Check if the door stays in place when closed.
Listen for any unusual sounds.
Make sure the door does not swing open or shut on its own.
If you spot a problem, go back and adjust the hinges again. Many suppliers in China design their hinges for easy tweaks, so you can fix small issues without taking the door off.
Fine-Tune for Seamless Fit
You want your hidden door to blend in perfectly. Take a step back and look at the door from different angles. Does it sit flush with the wall? If not, use the hinge adjustment screws to fine-tune the position. This is where you get that seamless install you want.
A table can help you remember what each adjustment screw does:
Adjustment Screw | What It Changes | When to Use It |
Height | Moves door up/down | Gap at top or bottom |
Depth | Moves door in/out | Door not flush |
Side-to-side | Moves door left/right | Uneven side gaps |
Keep making small changes until the door looks and feels just right. You can always reach out to your manufacturer or supplier for extra tips if you need help.
Remember: Patience pays off. Take your time, and you will get a seamless result that looks great and works perfectly.
Troubleshooting and Maintenance
Common Issues
You might run into a few problems after installing hidden door hinges. Sometimes, the door does not close smoothly. Other times, you hear squeaks or notice the door sticks. These issues often come from small alignment mistakes or a lack of regular care.
Here are some common issues you may face:
The door rubs against the frame or floor.
Hinges make squeaking or grinding noises.
The door sags or does not stay closed.
The hinge feels loose or wobbly.
The door does not sit flush with the wall or cabinet.
Most of these problems have simple fixes. You can adjust the hinge screws or check the alignment. If you use hinges from a trusted manufacturer or supplier in China, like D&D HARDWARE, you get detailed instructions for troubleshooting. Their products often include 3D adjustability, which makes small corrections easy.
Tip: Always check for loose screws first. Tightening them can solve many problems right away.
Prevent Squeaks and Sticking
You want your hidden door to open and close quietly. Squeaks and sticking usually mean the hinges need a little care. Regular maintenance keeps your hinges working smoothly and extends their lifespan.
Try these steps to prevent squeaks and sticking:
Apply a few drops of lubricant to the moving parts of the hinge. Use a silicone-based spray or light machine oil.
Wipe away any dust or debris from the hinge area.
Open and close the door several times to spread the lubricant evenly.
Repeat this process at least twice a year, or whenever you hear a squeak.
Hidden hinges have a concealed design. This shields them from dust, moisture, and physical damage. It also reduces wear and tear compared to traditional hinges. Regular lubrication protects the metal from rust and corrosion. It also reduces friction, so your door moves smoothly.
Note: Routine maintenance helps you avoid costly repairs. It also keeps your door looking and working like new.
Long-Term Care
You want your hidden hinges to last for years. Good care makes a big difference. Hidden hinges cost more than standard hinges because of their design and installation. However, their durability and seamless look make them a smart investment.
Here's a simple table to help you remember key maintenance tasks:
Task | How Often | Why It Matters |
Lubricate hinges | Every 6 months | Prevents rust, reduces friction |
Check alignment | Yearly | Stops sagging, keeps door flush |
Tighten screws | As needed | Prevents wobbling and misalignment |
Clean hinge area | Every 3 months | Removes dust, keeps movement smooth |
Regular care extends the lifespan of your hinges.
Seasonal lubrication and quick fixes reduce replacement costs.
Immediate attention to squeaks or sticking prevents bigger problems.
If you ever need help, reach out to your manufacturer or supplier in China. Companies like D&D HARDWARE offer technical support and advice for long-term care. When you follow these steps, your hidden door hinges will keep working smoothly and looking great for years to come.
You can install hidden or invisible door hinges and get a seamless, modern look. Just follow these steps:
Gather the right tools and certified hardware.
Measure, mark, and align everything carefully.
Take your time with installation and adjustments.
Quality hinges from a trusted manufacturer or supplier in China give you reliable, long-lasting results.
Need help? Reach out to D&D Hardware for technical support or answers to your questions.
FAQ
How do I know if hidden door hinges will fit my door?
Measure your door's thickness and weight. Check the hinge specifications from your supplier or manufacturer. If you buy from a trusted supplier in China, like D&D HARDWARE, you get clear sizing charts and support.
Can I install hidden hinges on an existing door?
Yes, you can. You need to mortise the door and frame for the hinges. Use a template for accuracy. Many manufacturers include guides to help you retrofit hidden hinges.
What tools do I need for hidden hinge installation?
You need a drill, mortising jig, chisel, screwdriver, measuring tape, and a pencil. Some suppliers in China offer complete kits. These kits include all the tools and templates you need.
Are hidden door hinges strong enough for heavy doors?
Absolutely! Many hidden hinges support over 100 pounds. Always check the weight rating from your manufacturer or supplier. For heavy doors, choose certified hinges tested for durability.
How do I adjust hidden door hinges after installation?
Most modern hidden hinges offer 3D adjustability. Use a screwdriver to turn the adjustment screws. You can move the door up, down, in, or out. This helps you get a perfect fit.
Adjustment | What It Does |
Height | Moves door up/down |
Depth | Moves door in/out |
Side | Moves door left/right |
Do hidden hinges need special maintenance?
Hidden hinges need little care. Lubricate them twice a year. Wipe away dust. Tighten screws if needed. If you use certified hinges from a supplier in China, you get long-lasting performance.
Where can I buy certified hidden door hinges?
You can order from a professional manufacturer or supplier in China. D&D HARDWARE offers certified, fire-rated, and adjustable hidden hinges. They provide technical support and fast shipping for your project.
Need more help? Contact your supplier for expert advice and installation tips.
D&D Hardware is ISO 9001 certified factory with 18 years experience specialize in door hardware comply to CE BS EN and ANSI/BHMA UL standard, Our main products are Door Hinge, Mortise lock, Lever handle, Cylinder, Door Closer, Panic device, smart lock, concealed hinge, glass hardware, barn door hardware and door accessories etc. for Wooden door, Hollow metal door and fire rated using.
Pls feel free to contact us!click here.
Contact: David Jian
Mob:0086-139 2903 7292
Email: David@dndhardware.com, sales@dndhardware.com,
Jobby Zhang
Mob:0086-137 2599 9617
Email: jobby@dndhardware.com


 English