Fitting heavy-duty concealed hinges for full-sized doors or contemporary 3D adjustable conceaeld hinge hinges—offers a high-end upgrade that achieves a sleek, invisible aesthetic. This installation is intended for interior doors between rooms, not cabinet doors. While it demands precision, the final outcome—a clean, hardware-free appearance—makes it all worthwhile.
Essential Tools You’ll Require:
*Router equipped with a sharp straight bit (¼” or ½”)
*Chisel, mallet, and clamps
*Drill and screwdriver bits
*Measuring tape, carpenter’s square, and pencil
*Manufacturer’s template (crucial for accuracy)
*Safety glasses
Installation Overview: Two Primary Types
1. SOSS-Style Hinges (Non-Adjustable)
These are precision-engineered, barrel-type hinges that are fully mortised into both the door and frame. Since they are non-adjustable, extreme accuracy during installation is imperative.

2. 3D Adjustable Concealed Hinges
These operate similarly but feature a concealed mechanism that enables vertical, horizontal, and depth adjustments post-installation, offering greater flexibility for fine-tuning.


Step-by-Step Installation Instructions
Step 1: Template & Marking (The Most Critical Step)
Obtain the Template: Whether it’s a paper template from SOSS or a metal jig from another manufacturer, this guide is indispensable for success. Do not improvise.
Mark the Door and Frame: Securely clamp the template to the edge of the door at the precise location for the hinge. Typically, two hinges are installed: one 7 inches from the top and another 7 inches from the bottom. Use a square to ensure perfect vertical alignment. Repeat this marking process on the door frame (jamb).
Step 2: Creating the Mortise
Adjust Router Depth: The template will indicate the exact depth required for the hinge barrel and plate. Set your router accordingly.
Route the Mortise: Carefully trace the template’s outline with your router to create the recess in both the door edge and the door jamb. Perform multiple shallow passes for a clean, controlled cut.
Square the Corners: Use a sharp chisel and mallet to refine the corners, ensuring they are perfectly square so the hinge sits flush.
Step 3: Dry Fitting and Hanging
Test Fit the Hinge: Insert the hinge into the mortised recesses on both the door and frame. It should fit flush with the wood surface. For SOSS hinges, this fit must be precise.
Verify Swing: Before securing anything, confirm that the door opens and closes smoothly.
Step 4: Securing the Hinges
Attach the Hinge: Once the fit is verified, firmly screw the hinge into place using the provided screws. If installing a pair, start with the top hinge to support the door’s weight.
Step 5: Final Adjustments (3D Hinges Only)
This is the benefit of 3D hinges. Locate the adjustment screws (usually accessible from the top or side of the hinge when the door is closed).
Depth: Adjust to ensure the door is perfectly flush with the frame.
Vertical/Horizontal: Tweak to eliminate any gaps or misalignment.
Make minor adjustments and recheck the door after each turn.
Key Pro Tips & Warnings
*Accuracy is Paramount: Even a 1mm deviation can result in a misaligned door. Measure carefully and route only once.
*Door Weight: Confirm that the hinges are rated for the weight and size of your door. Solid core doors necessitate heavy-duty models.
*Enlist Assistance: Full-sized doors are heavy and cumbersome. Having an extra set of hands is invaluable for holding during test fittings.
*Watch a Tutorial: This is a project where visual guidance is extremely beneficial. Before beginning, search for "SOSS hinge installation" or "[Your Brand] 3D invisible hinge install" on YouTube.
*By proceeding methodically and adhering strictly to the manufacturer’s instructions, you can achieve a stunning, professional finish that dramatically enhances the appearance of your door.
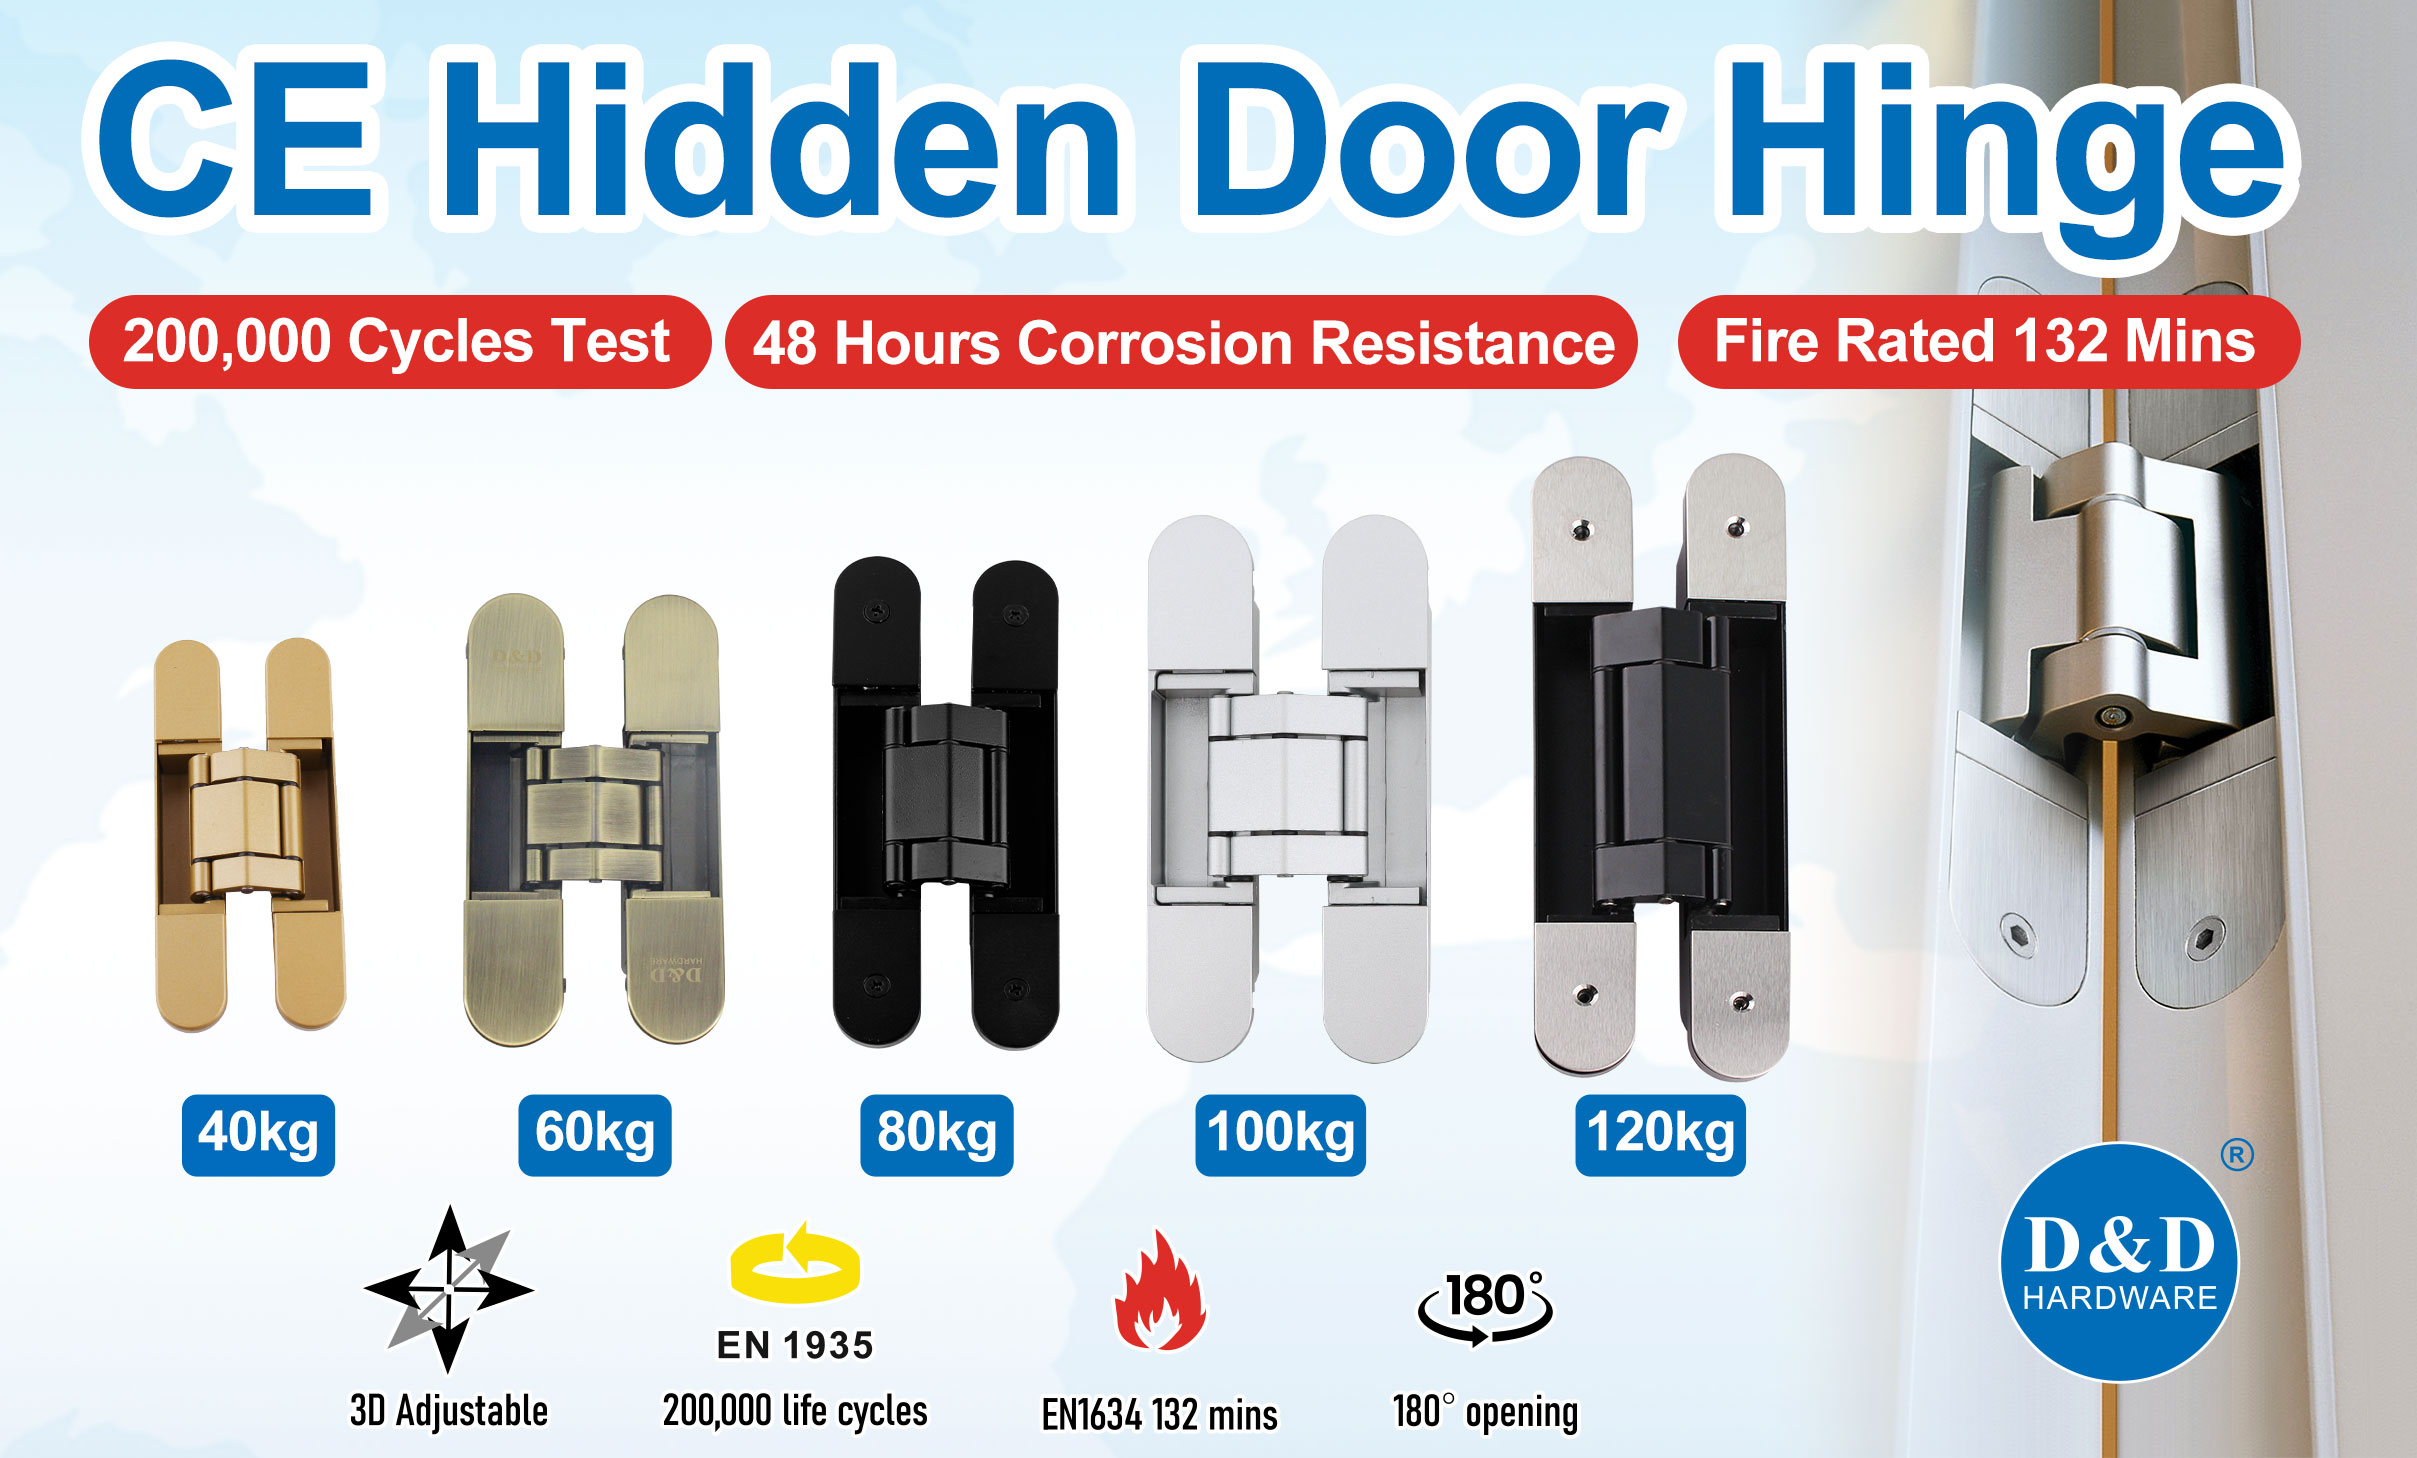
D&D manufacture Door Hardware Accessories for hollow metal doors, wooden door and fire rated doors, with CE, UL, ANSI certification, 3 hours fire rating, which will meet your local requirement. Products are suitable for education, healthcare, hotel, government, apartment building, hospitality and commercial applications.
More about hidden door hinges, click here.
Contact us Now: Contact: David Jian
Mob:0086-139 2903 7292
Email: David@dndhardware.com, sales@dndhardware.com,
Jobby Zhang
Mob:0086-137 2599 9617
Email: jobby@dndhardware.com
D&D HARDWARE INDUSTRIAL CO.,LTD
ADD:12th Floor, Building 2, No.898, KeChuang Technical Zone, Jiangmen Avenue, Pengjiang District, Jiangmen City, Guangdong, China (Postcode:529000)
Https://www.dndhardware.com
Tel:+86-750-3856396
Fax: +86-750-3856395
Hidden Door Hinge
Hidden Door Hinges
HIdden hinge


 English